Changing a Juki Nozzle in OpenPnP — What You Have to Recalibrate
Swapping a nozzle tip is the easy half: park the head, loosen the adapter sleeve, screw the new tip on, snug it down. The half that decides whether the next board comes out straight happens in OpenPnP afterwards. Three measurements belong to the tip you just took off, and only one of them raises an error once it goes stale.
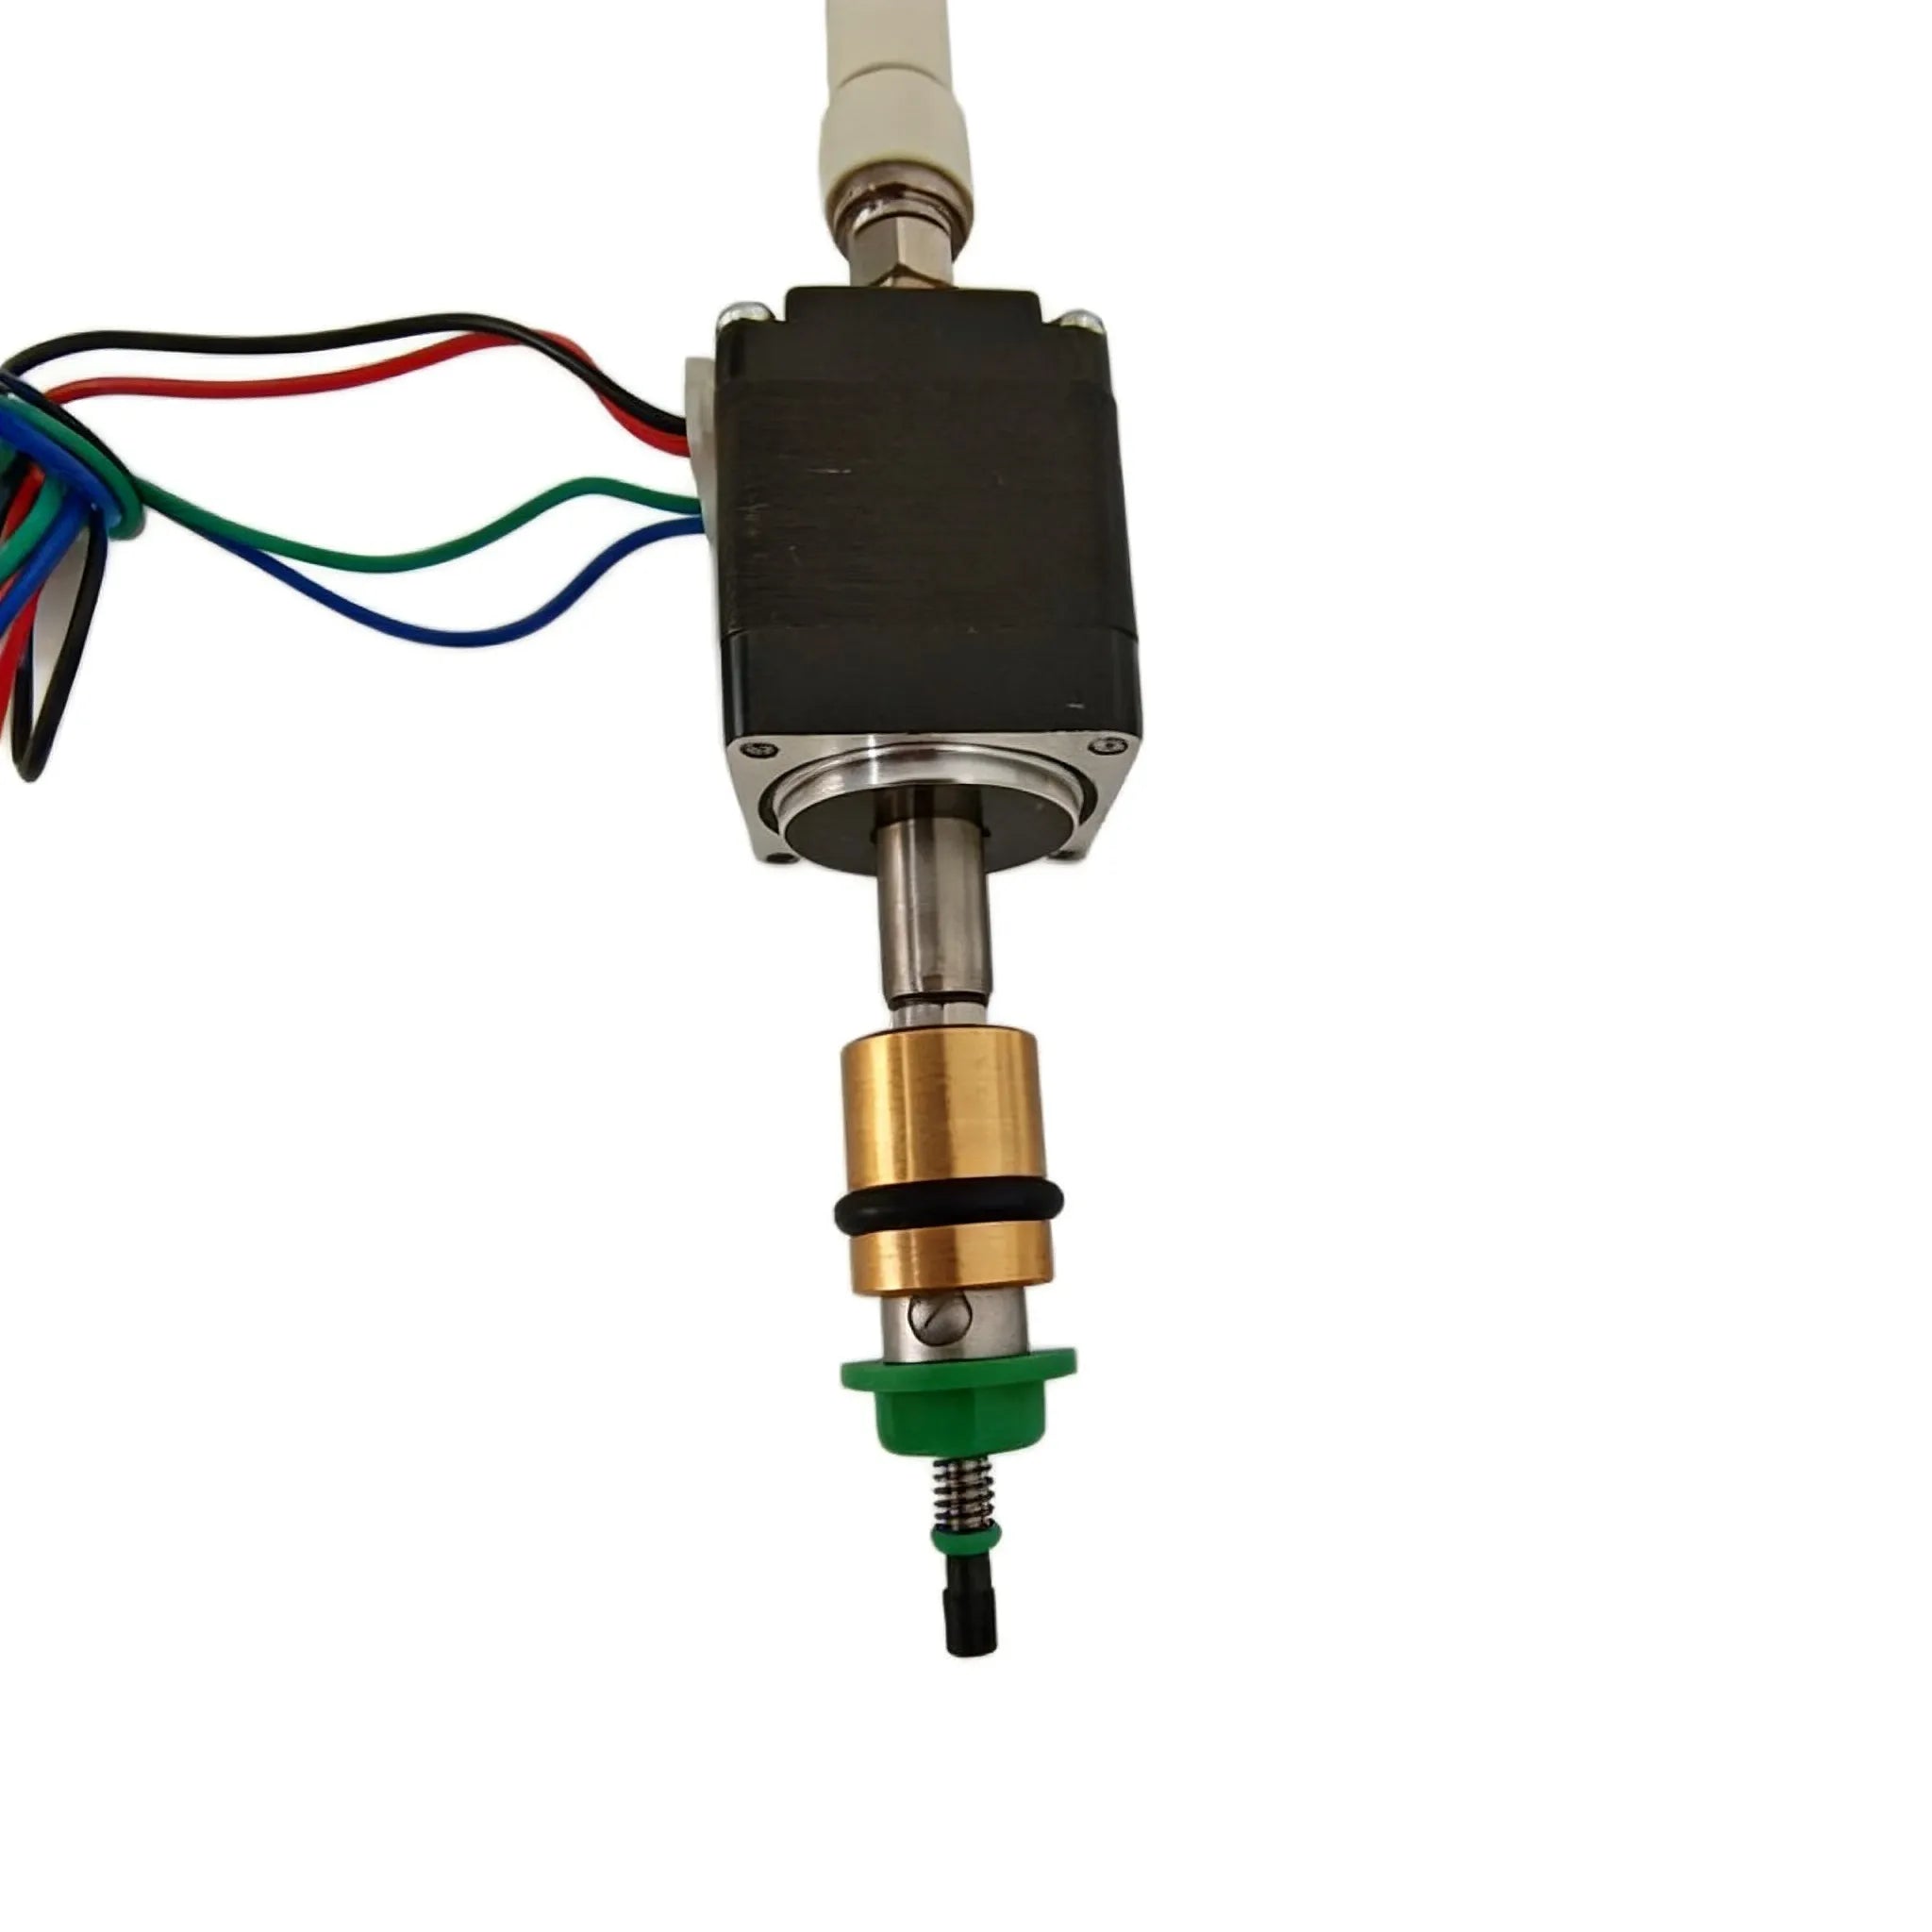
Three measurements belong to the tip
OpenPnP splits the tool into a nozzle and a nozzle tip. The tip is the part that touches components, and it carries its own calibration. Three things come out of one calibration pass:
- Nozzle tip runout compensation. The tip is rotated above the bottom camera and its position recorded at each angle. The result is a combined nozzle plus tip number stored against the nozzle id, not the tip. OpenPnP's own source comment calls it the "combined nozzle tip + nozzle runout compensation for the nozzle we are currently attached to".
- The bottom vision background baseline. The same pass captures the empty tip against the background and derives a brightness cutoff, plus a key colour to mask for Juki-style tips. It reuses the runout images, so it costs no extra machine movement, but it was measured through the tip that was mounted at the time.
- The tool-specific bottom camera offset. With two nozzles the Z axes are not perfectly parallel, so the true camera location differs slightly per tool. The calibration measures and applies that offset for the nozzle being calibrated.
The tip object also holds the numbers bottom vision uses to crop its search: min. part diameter, max. part diameter, max. part height and max. pick tolerance. Those follow whichever tip you tell OpenPnP is loaded.
Pick height is not stored on the tip
There is no per-tip Z offset in the nozzle tip configuration, so a tip change moves the bottom of the tool without moving anything in the config to match. On a Vertex 4 the pick depth comes from the feeder's pick height, set once per feeder by jogging Z down until the tip just touches the component.
Two consequences, and they pull in opposite directions. A tip that ends up sitting higher than the one you calibrated under stops reaching the part, and the pick fails without any hardware error. A tip that sits lower pushes into the tape pocket or into the component, and you find out later when parts come out cracked or the tape carrier is dented around the pick window. Neither symptom looks like a software problem, which is why this step gets skipped.
Auto Recalibration, and why a hand swap slips past it
Every nozzle tip has a Calibration tab with an Auto Recalibration setting. OpenPnP's recalibration trigger has four values:
| Auto Recalibration | When the calibration runs |
|---|---|
NozzleTipChange | on every tip load or unload, and during homing |
NozzleTipChangeInJob | on tip changes inside a job (the default in current OpenPnP builds) |
MachineHome | during homing, if the tip was not already calibrated |
Manual | only when you press Calibrate |
All four are triggered by OpenPnP's own tip change: the load and unload buttons, or an automatic tip changer. A Vertex 4 has no tip changer, so a swap is done with a wrench and nothing tells OpenPnP that the geometry changed. The trigger never fires, the previous tip's combined runout number stays in the configuration, and the machine applies it to the new tip for as long as you let it.
The stock PikkoBot config names its two tip objects N045 and N24, following LumenPnP convention, while the hardware takes Juki tips. Check which object is loaded before you calibrate. The wizard measures whichever tip OpenPnP believes is on the nozzle, so calibrating the wrong object benches the wrong dimensions and leaves the tip you are actually running uncalibrated.
The order to redo it in
- Park the tips and save the configuration. The P button between the Z jog arrows parks the nozzles at a safe height. Do a File → Save Configuration before you touch anything, so a bad calibration is one reload away from being undone.
- Load the tip object you are actually running. Machine Setup → Nozzle Tips → select the tip → press the load button. OpenPnP will not use a tip that is not loaded on a nozzle, and bottom vision reads its dimensions from that object.
- Level the two nozzles. You just changed the mechanical stack on one side, so the paper-pinch check is worth thirty seconds: slide paper onto the datum board, lower Z until the first nozzle pinches it, then bring the second down to the same pinch without moving Z. If they differ, adjust the holder. The procedure is on Homing & Fiducial.
- Calibrate the nozzle tip. Machine Setup → Nozzle Tips → your tip → Calibration tab → Calibrate. Current OpenPnP builds use the self-tuning Circular Symmetry pipeline, and Issues & Solutions will set up the vision diameter for you.
- Check that it holds. Position the tool over the bottom camera, then rotate the nozzle and watch the tip. The centre should stay in the crosshairs through the full turn. The status line reports how large the runout was. If you use Bottom-Vision Pre-Rotation to place at the final rotation, an uncompensated tip shows up as a placement offset that follows the angle.
- Verify pick height on a real part. Pick one component, let bottom vision photograph it, and look at the image before starting a job. A tip that is not reaching the part reads as a misdetect or as a part sitting at the wrong offset; a tip that is too low shows drag marks on the tape.
- Repeat for the second nozzle. Each nozzle keeps its own tip object and its own calibration.
When the wizard stops with too many misdetects
The wizard compares detected tip positions between angles and gives up when too many measurements are unusable. What to look at, in order:
- Circle divisions. The default is six measurements across the rotation. Three is the floor, taken at -180°, -60° and 60°. More measurements cost time and give a smoother result; fewer are less tolerant of one bad frame.
- Allowed misdetects. Set to 0 by default, so a single bad frame ends the run. Raising it makes the calibration survive one or two misses, with the constraint that at least three measurements have to remain.
- Offset threshold. This rejects measurements that landed implausibly far from centre. The wiki suggests a value slightly above the largest runout plus offset you expect for that tip. Set it too tight and good measurements get thrown away with the bad ones.
- Exposure and contrast. A dark tip against a dark background has little for the detector to work with. The wiki's guidance for black-on-black tips uses the air hole as the detection feature, since it reads as the darkest area: manual exposure, threshold tuned so only the hole is masked, Hough circle diameters set a few pixels either side of the real hole diameter, a larger MedianBlur kernel and a tight mask circle. Rotate the nozzle and refresh the image repeatedly while tuning the pipeline, rather than trusting one frame.
- A changed exposure. If you retune bottom camera exposure for one nozzle, retest the other one. The bottom camera page covers exposure and why it decides pick quality.
Reading the symptom back to the missed step
| What you see | What was skipped |
|---|---|
| Placement offset that changes with the nozzle rotation angle | Runout calibration |
| Intermittent picks, part left in the tape, no error in the log | Pick height, or a tip too large for the part |
| Parts cracked, or the tape carrier dented around the pick window | Pick height, tip sitting lower than before |
| Wizard fails on the second nozzle but passed on the first | Exposure or lighting changed between runs |
A Vertex 4 has no vacuum pressure sensor, so a failed pick is reported by bottom vision rather than by a pressure threshold. That moves the failure later in the cycle: the nozzle descends, lifts nothing, travels to the camera and fails on an empty field of view. If you are used to machines that alarm at the nozzle, the timing takes a few boards to get used to. There is more on this in the FAQ.
What you do not have to redo
- The top camera to nozzle offset. It is measured once with a putty or clay mark on a scrap PCB, and the wiki's instruction is to rotate the nozzle a full turn while making the mark so the runout averages out of the measurement. This one belongs to the tool, not the tip. Do not set nozzle offsets in the motion controller firmware; OpenPnP needs those distances itself. Note the reverse direction: changing the nozzle offset invalidates the tip calibration, so the runout pass has to be repeated afterwards.
- Feeder configuration and slot assignment. Pick heights, tape widths and addresses are unaffected. See Feeder Overview for how the 50 slots are allocated.
- Homing fiducial and mm-per-pixel. Both sit upstream of the tip and neither changes in a swap. The full sequence is on OpenPnP v4 Calibration.
Part numbers and spares
The nozzle set and assemblies we stock for this head, as of the current store listing:
| Part | Contents | Price |
|---|---|---|
| Nozzle assembly, single | 503 tip, holder, connecting rod, 4 mm fitting, 28 mm stepper | $49 |
| Nozzle assembly, pair | 503 + 505 assemblies | $98 |
| Juki-compatible nozzle set | 502, 503, 504, 505, 506, 507 tips | $69 |
| Head module kit | Dual nozzle head, ships with 503 + 505 | $239 |
The 503 covers 0402 through 1206 and the 505 takes ICs and larger chip packages. The nozzle set is tips only: no head module, rod, motor or fitting. Pair it with a single assembly if you are replacing a worn tool rather than widening your range.
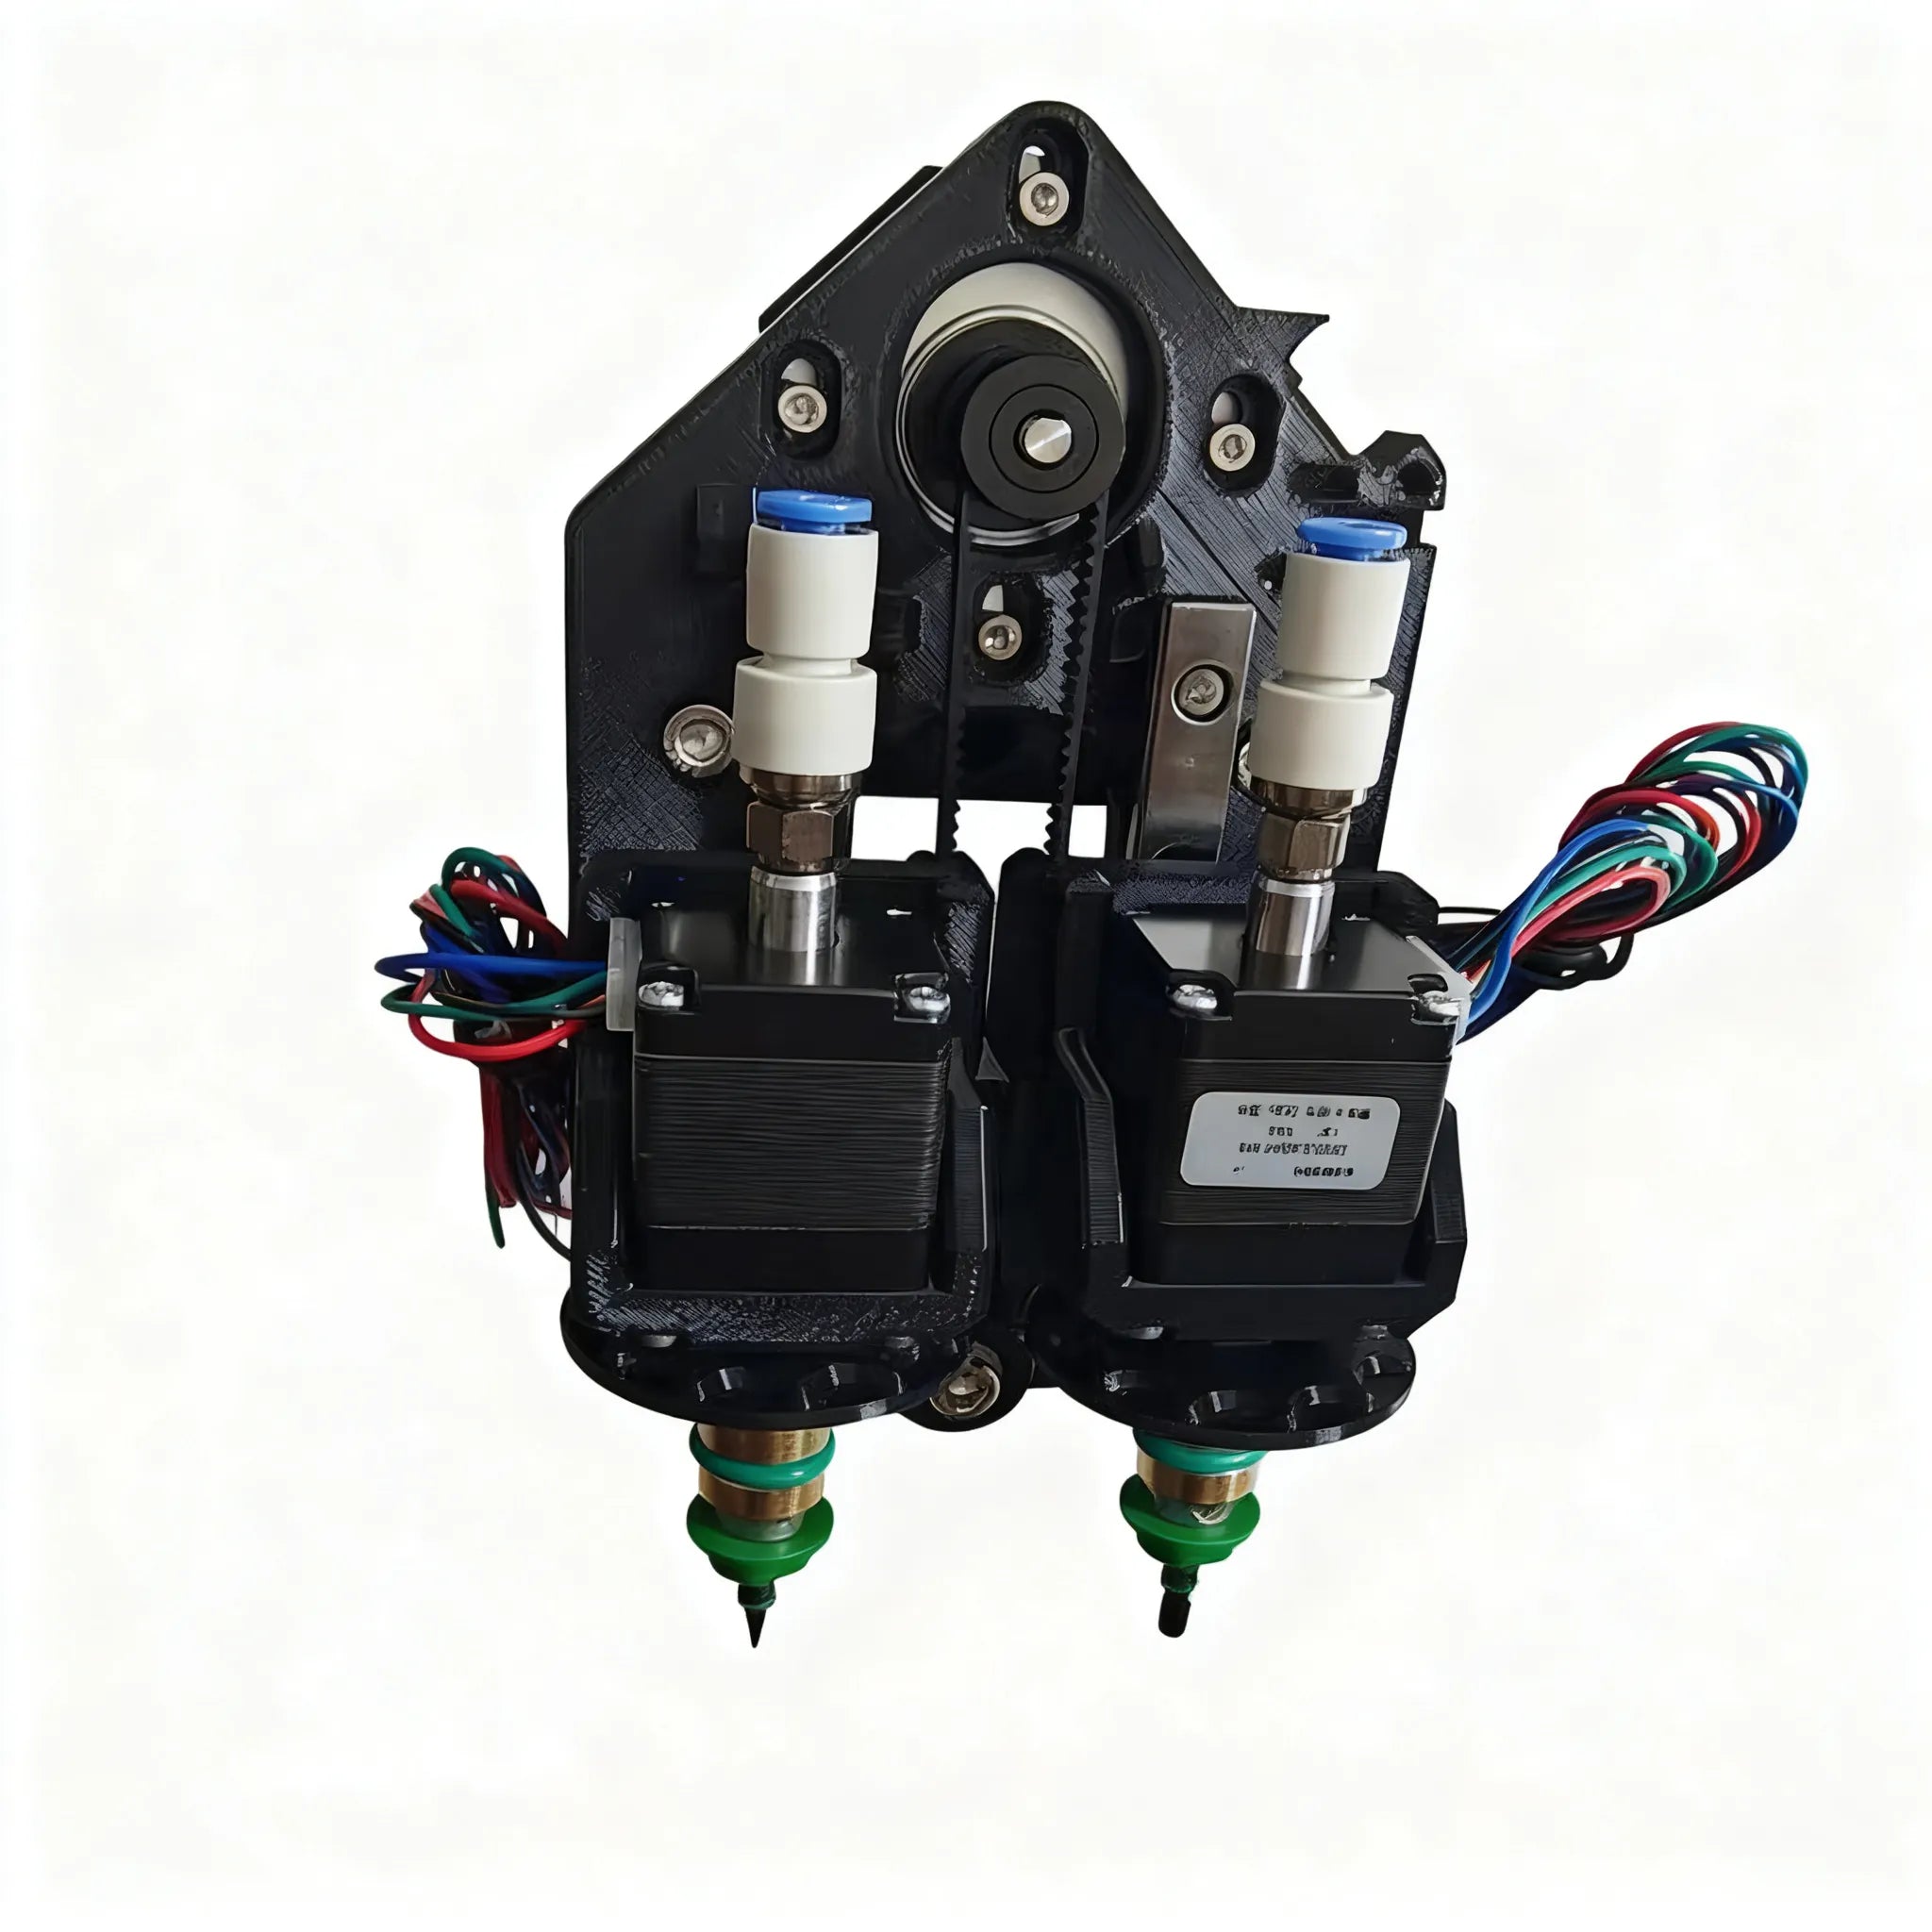
Tips ship black by default, which is deliberate. A black tip reads more cleanly in nozzle tip calibration than a bare metal one, and it matters more on a machine with no vacuum sensor, where a bad pick has to be caught by looking at the tool. If you source tips elsewhere, check this before ordering.
Which tip suits which component is on Juki Nozzle Compatibility, and the reasoning behind the 0201 and 0402 boundary is on 501 vs 502. If a pick is failing right now on a machine that was placing well yesterday, ask what changed on the tool before you touch the vision pipeline.